How to make a zat'nik'tel
This manual goes through how to paint a zat'nik'tel so it looks like the ones used on SG-1 in the early seasons - that is, sort-of golden. Later on many of the zat'nik'tels shown are more greyish. They can be made the same way, just change the colours :)
First you need to get a zat'nik'tel kit (or make one yourself, of course...) They can often be bought at conventions or on eBay. A place that will usually have them is Frontier Models in the UK. They will happily send to both Europe and US, probably everywhere else as well. Click "Replica Blasters and Phasers" and look around. They will usually have zat'nik'tel kits - both open, closed, and moveable.
I have bought one of the moveable, as well as the closed one. The moveable one is more difficult to assemble. This is how the box looks for one of the locked-in-closed position ones.

Inside the box you will find several pieces (this is for the moveable zat'nik'tel):
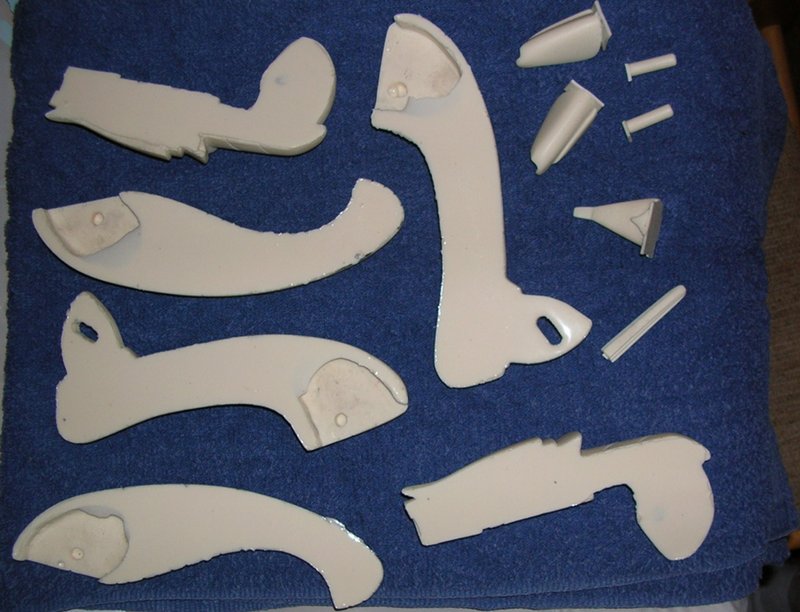
After cleaning/sanding etc.

The locked-in-closed position zat'nik'tel is only made of two pieces which needs to be glued together. This is how it looks (after cleaning and priming).

The pieces for the zat'nik'tel will need to be cleaned of the stuff left over from casting. It is very important to make sure all sides and edges are cut and sandpapered well so no ridges are left over from the casting, otherwise the pieces will not fit together. Afterwards, wash all pieces in soapy water and rinse, then dry thoroughly.
You will need various tools and paints.

I used a scalpel for cutting off rough edges and creases from the casting process. You will also need coarse, medium, and fine grit sandpaper to sand it smooth. To glue it together you can use any sort of strong glue for plastic hobby kits. You may also need a filler if the casting process left over any holes that need filling.
You will then need a primer - I used Testor flat grey enamel spray. Instead of paint I used rub'n'buff spanish copper and rub'n'buff patina to colour the zat'nik'tel. They can both be bought from Amazon. It is possible to use spray paint or ordinary hobby paint instead, of course. Besides these, you need either a patina-coloured paint or light blue and medium green paint to mix. I went with the last option, as I couldn't find any patina-coloured paint.
You will also need purple pearl paint for the "tail", and perhaps golden paint for an extra light finish at the very end.
To apply the rub'n'buff, you need q-tips and an old towel or rag. For the paints you need at least a medium size round brush and a very thin round brush, as well as a medium-small flat brush. It is important that the hairs does not come off easily or they will stick in the paint.
This shows the moveable zat-nik-tel pieces after cleaning, sanding, washing, and priming.

For the moveable zat'nik'tel you should use small flat rubber rings  (not sure what they are called) during the assembly, to make the moveable parts slide less loosely. Otherwise the finished toy will not be able to stay open. These "rings" should be put on the pins/dowels before assembly.

The various pieces should be glued together. For the moveable zat'nik'tel, the "body" should be assembled first, then the top, then those pieces should be put together. The "head" and "tip" on the head should be glued on last. Make sure everything has dried thouroughly before painting.


The locked-in-closed position zat'nik'tel, glued together and primed.

From now on, everything is mostly done the same way for the two kits. The only exception is that the moveable kit has a "tip" on the head, which should not be glued on until at the end, after painting, as it very easily will come off. This is a problem when you use the zat'nik'tel for larp or costuming. The locked-in-closed (or opened) position zat'nik'tels are more sturdy and only needs a touch-up on the paint from time to time.
I have chosen rub'n'buff spanish copper for the main colour of the weapons. Only use a little bit, and spread it fine on the resin with a q-tip. Don't use too much, or it will not stay on properly. When the vax has been distributed, use an old cloth or something to rub it thoroughly. It should be rubbed some more the next day, when it has dried. This makes it more shiny, and the colour will not come off as easily.
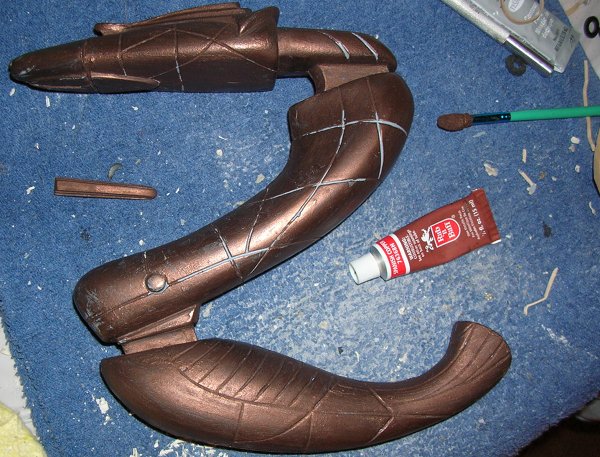

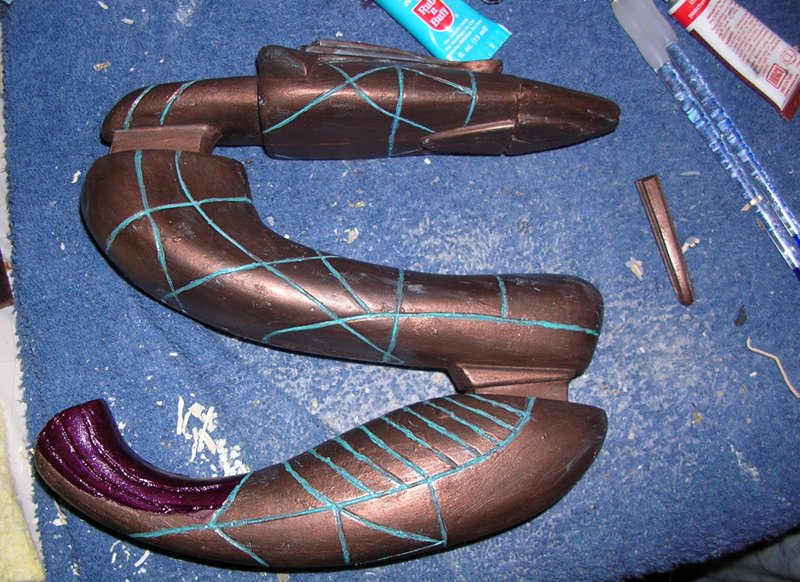
It is now time to paint the "veins". They should be patina coloured. As I couldn't find such paint, I bought a light blue and a medium green paint and mixed them to a satisfactory colour. I then used a very thin round brush to carefully paint all the veins - basically draw up all the groves in the zat'nik'tel. Afterwards, use a little of the patina rub'n'buff on a q-tip to put a little patina on the buttons and on the sides/edges of the thing on the top of the head.


Now, use the medium-small flat brush to apply the purple pearl paint to the tail.

The moveable zat'nik'tel now looks like this.
Glue the "tip" to the head of the moveable zat'nik'tel. After it has dried, you can now apply a little gold dusting with the larger round brush if you want to. Allow everything to dry thoroughly. You may wish to spray it with a thin layer of sealer - be careful to chose one that does not dissolve the vax in the rub'n'buff!
This is the result (moveable zat'nik'tel, closed and opened. Locked-in-closed position zat'nik'tel.)


